ODMS : Restaurants
- Updated on July 27th, 2024
- 17 Minute to read
- Share
-
Dark
1. Quick Overview
Purpose: Learn how to manage restaurants in ODMS
Pre-Requisites
Needed Access / Permissions: Access to the OPUS platform.
Pre-setup Requirements: Ensure you are logged into the OPUS account
2. Step-by-Step Instructions

1. Grid
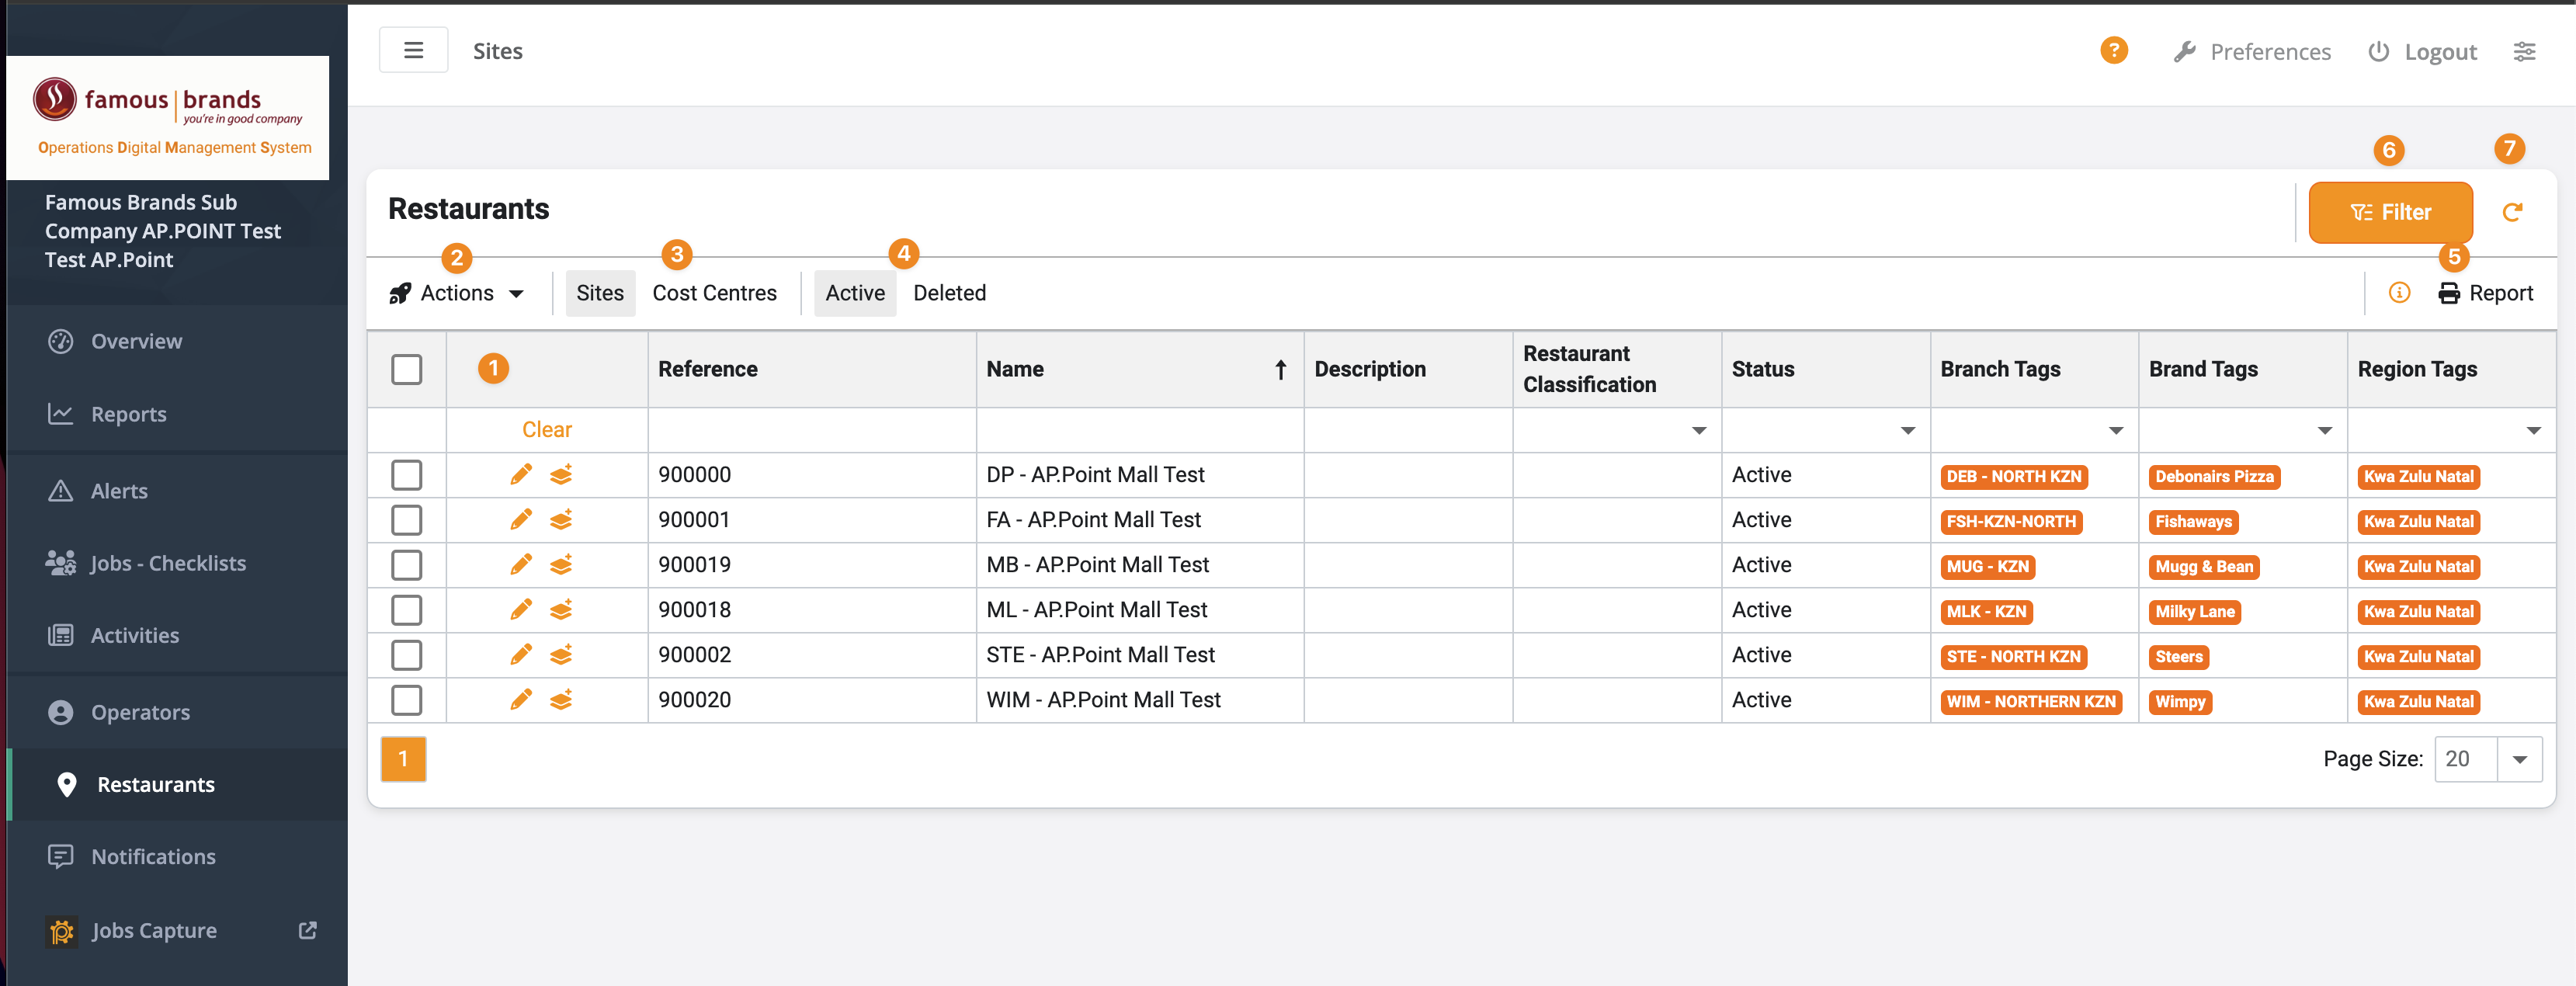
The grid displays a list of all restaurant sites with columns for Reference, Name, Description, Restaurant Classification, Status, Branch Tags, Brand Tags and Region Tags. Each entry provides detailed information about the restaurant site.
Usage: Use the grid to view and manage restaurant site details. Click on column headers to sort the data.
Columns:
- Reference: Unique identifier for the restaurant.
- Name: Name of the restaurant.
- Description: Additional details about the restaurant.
- Restaurant Classification: Category of the restaurant.
- Status: Current status (Active/Deleted).
- Branch Tags: Tags indicating branch details.
- Brand Tags: Tags indicating brand affiliations.
- Region Tags: Tags indicating regional information.
2. Actions

The Actions button provides a dropdown menu with various actions that can be performed on the selected restaurant sites. This includes options like editing, deleting or viewing site details.
Usage: Select one or multiple sites using the checkboxes, then click the Actions button to perform the desired action.
3. Site Selection

Allows users to select one or multiple sites from the list using checkboxes. This is useful for performing bulk actions on multiple sites.
Usage: Check the boxes next to the sites you want to select. You can then apply actions or filters to these selected sites.
4. Active / Deleted Sites

Allows users to switch between viewing active sites and deleted sites.
Usage: Click the “Active” tab to view all active sites. Click the “Deleted” tab to view all sites that have been deleted.
5. Report

The Report button allows users to generate and export reports based on the site data. Reports can be customized and exported in various formats such as XLS, CSV, PDF and more.
Usage: Click this button to generate and view reports on restaurant sites.
6. Filter

The Filter button provides options to apply various filters to narrow down the site list based on specific criteria such as dates, projects, checklists, team/operator, job tags and restaurant tags.
Usage: Click the Filter button to open the filter menu, then apply the desired filters to refine the site list.
7. Refresh

The Refresh button allows users to refresh the data on the page to ensure it is up to date.
Usage: Click the Refresh button to reload the data and view the most current information.
3. Tips and Tricks
Best Practices: Regularly use the filter and search functions to quickly find and monitor specific restaurant sites. Generate periodic reports to keep track of site details and performance.
Common Issues and Fixes:
If the site list does not update or display correctly, ensure your internet connection is stable. Refresh the page if necessary. Contact ODMS support if problems persist.
Additional Resources
- Refer to the ODMS support documentation for more detailed instructions and additional features related to restaurant site management.