ODMS : Users (Devices)
- Updated on July 27th, 2024
- 102 Minute to read
- Share
-
Dark
1. Quick Overview
Purpose: Learn how to create a user in ODMS and link them to a specific site with the necessary site roles and user roles to access jobs for that site.
Pre-Requisites
Needed Access / Permissions: Access to the ODMS platform.
Pre-setup Requirements: Ensure you are logged into the ODMS account
2. Step-by-Step Instructions
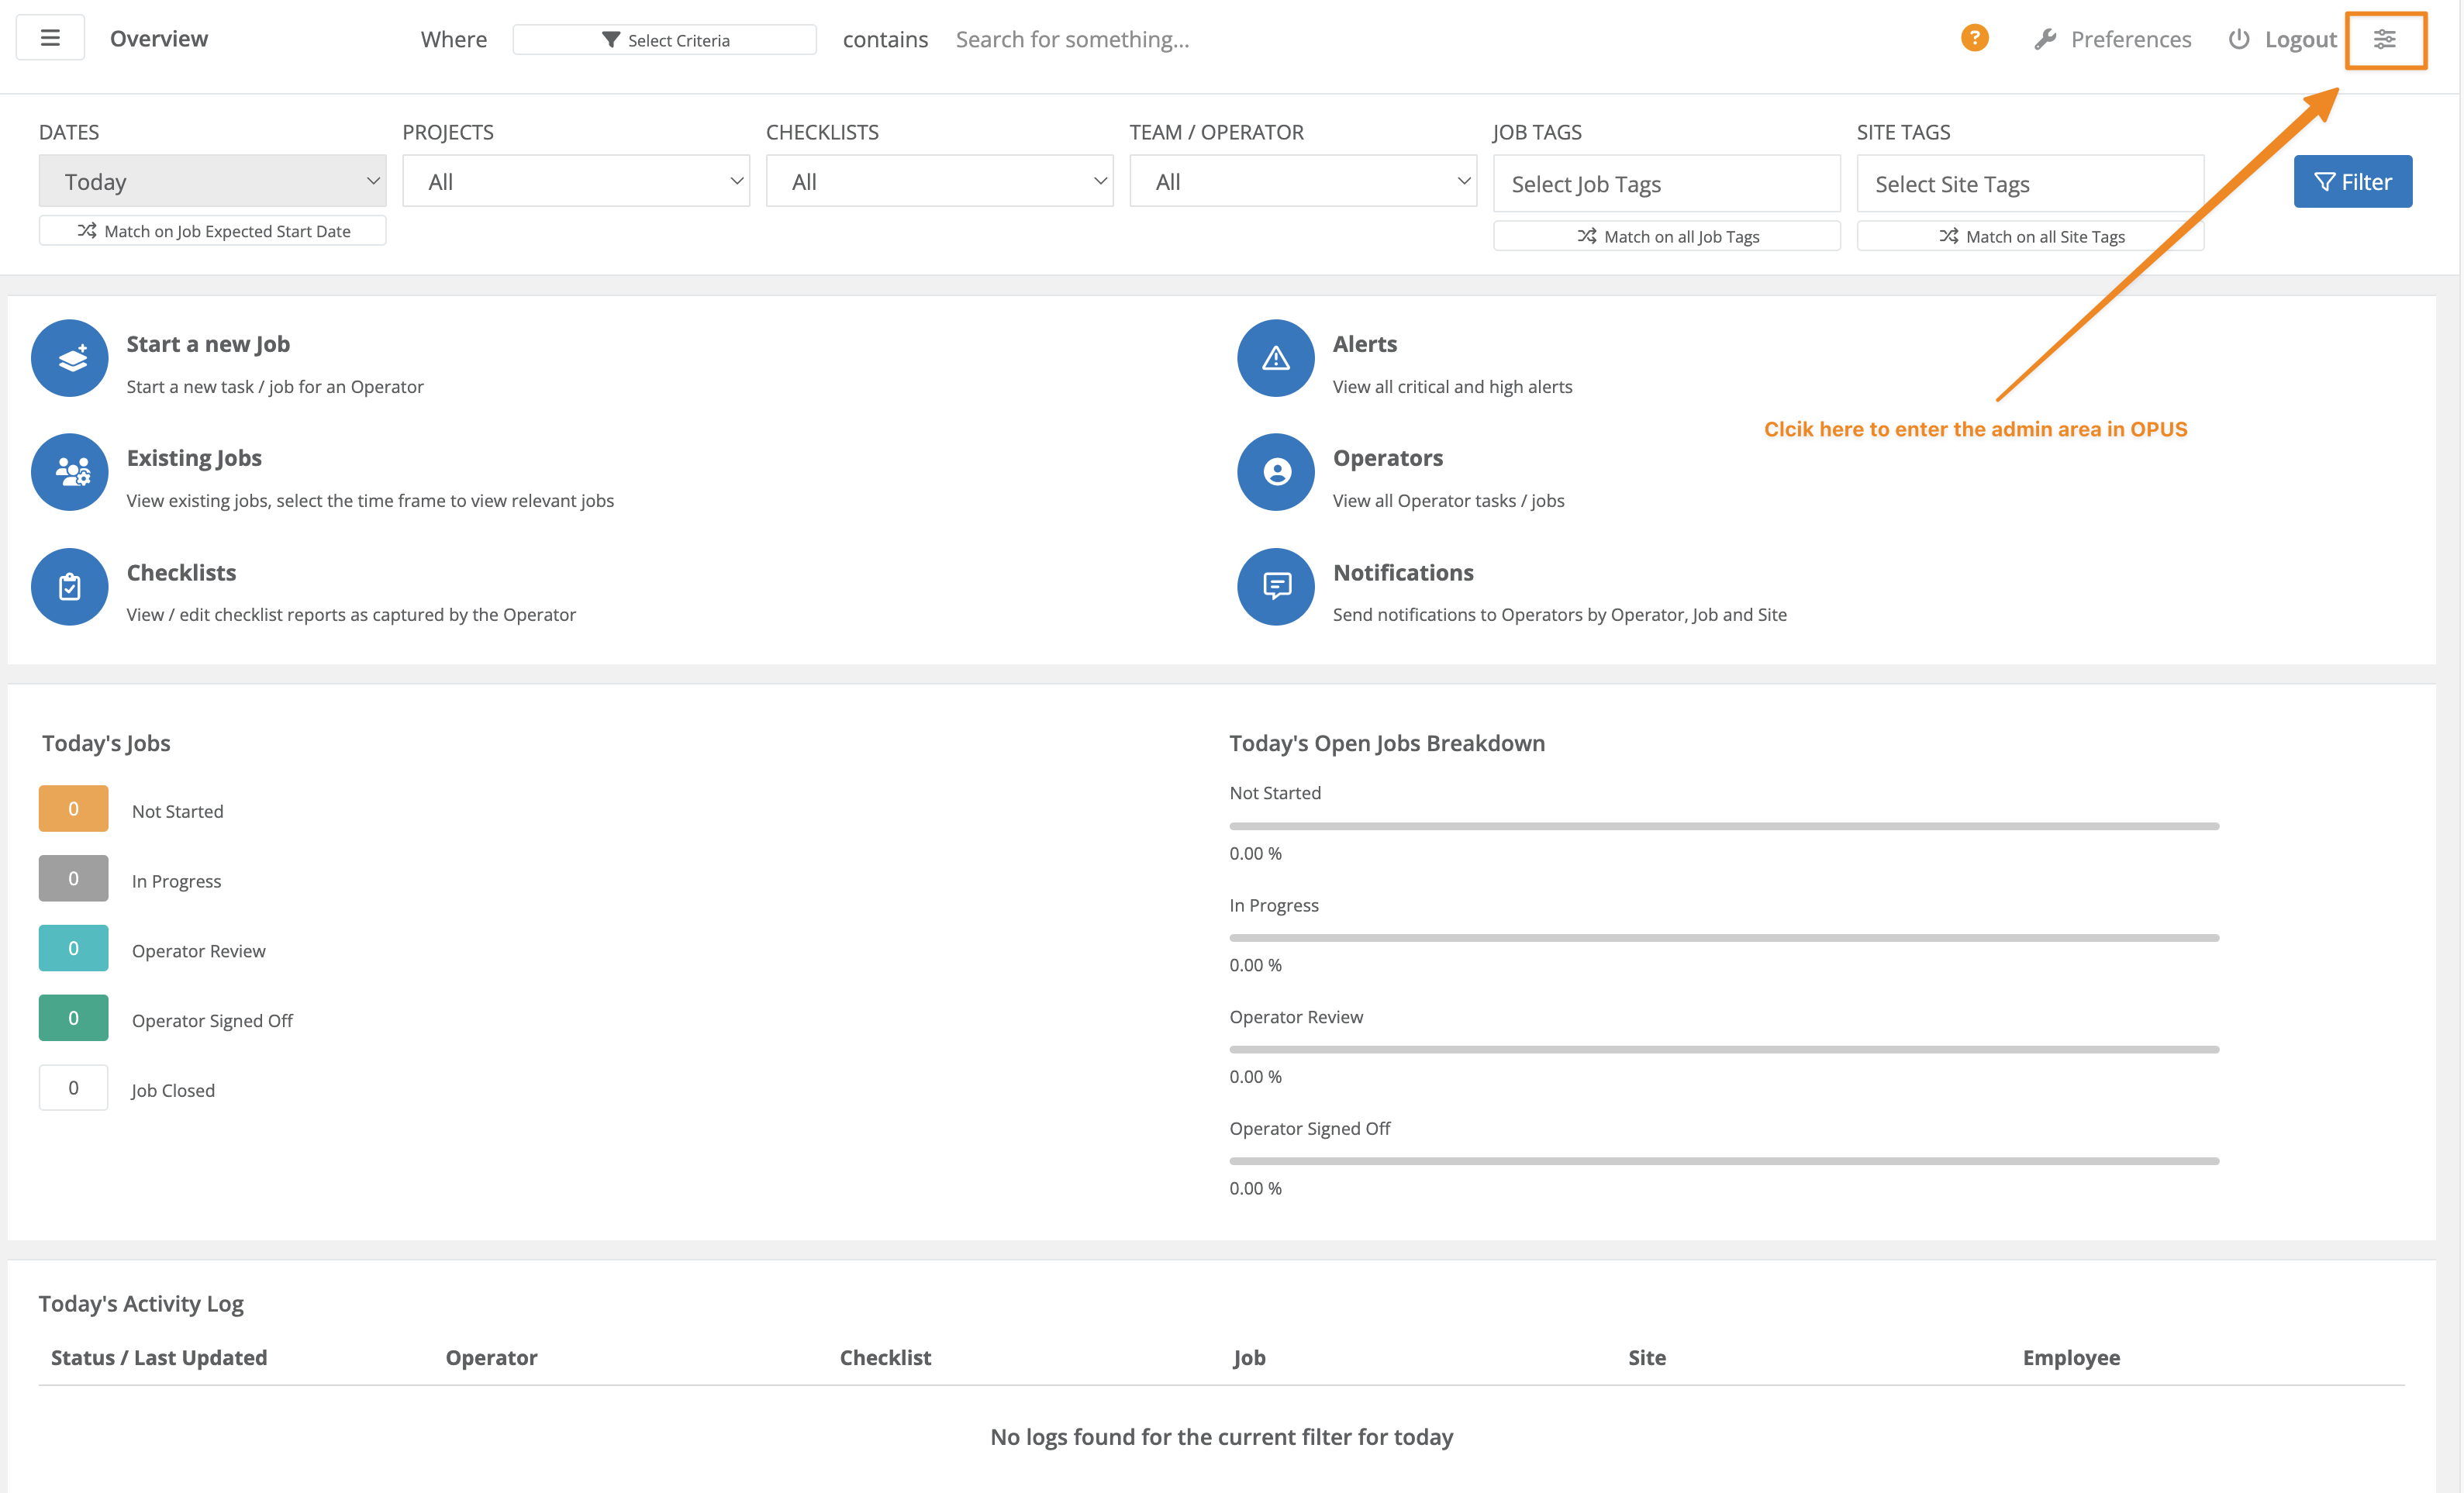
- Log in to ODMS as an administrator and navigate to the administrators section by clicking on the administrators settings menu at the top right corner.
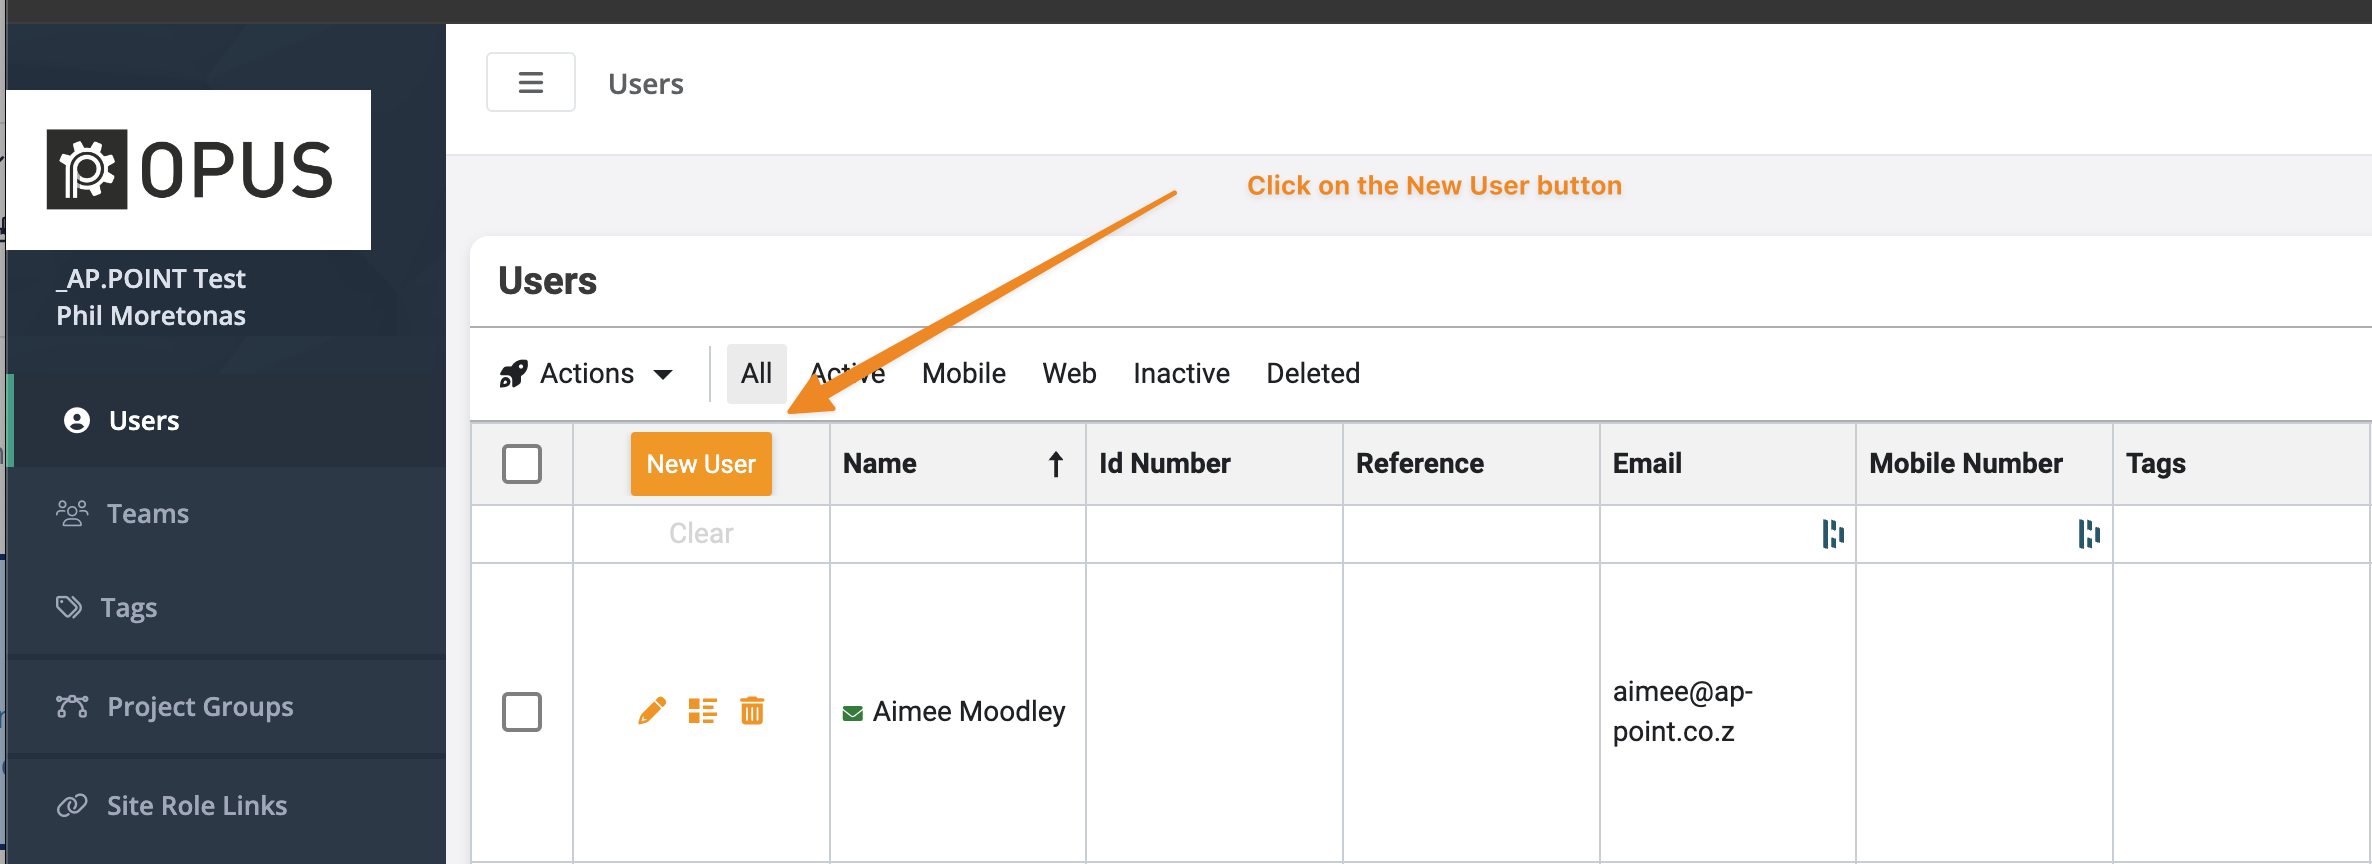
- On the Users screen, click on "New user" button on the top left of the user grid.
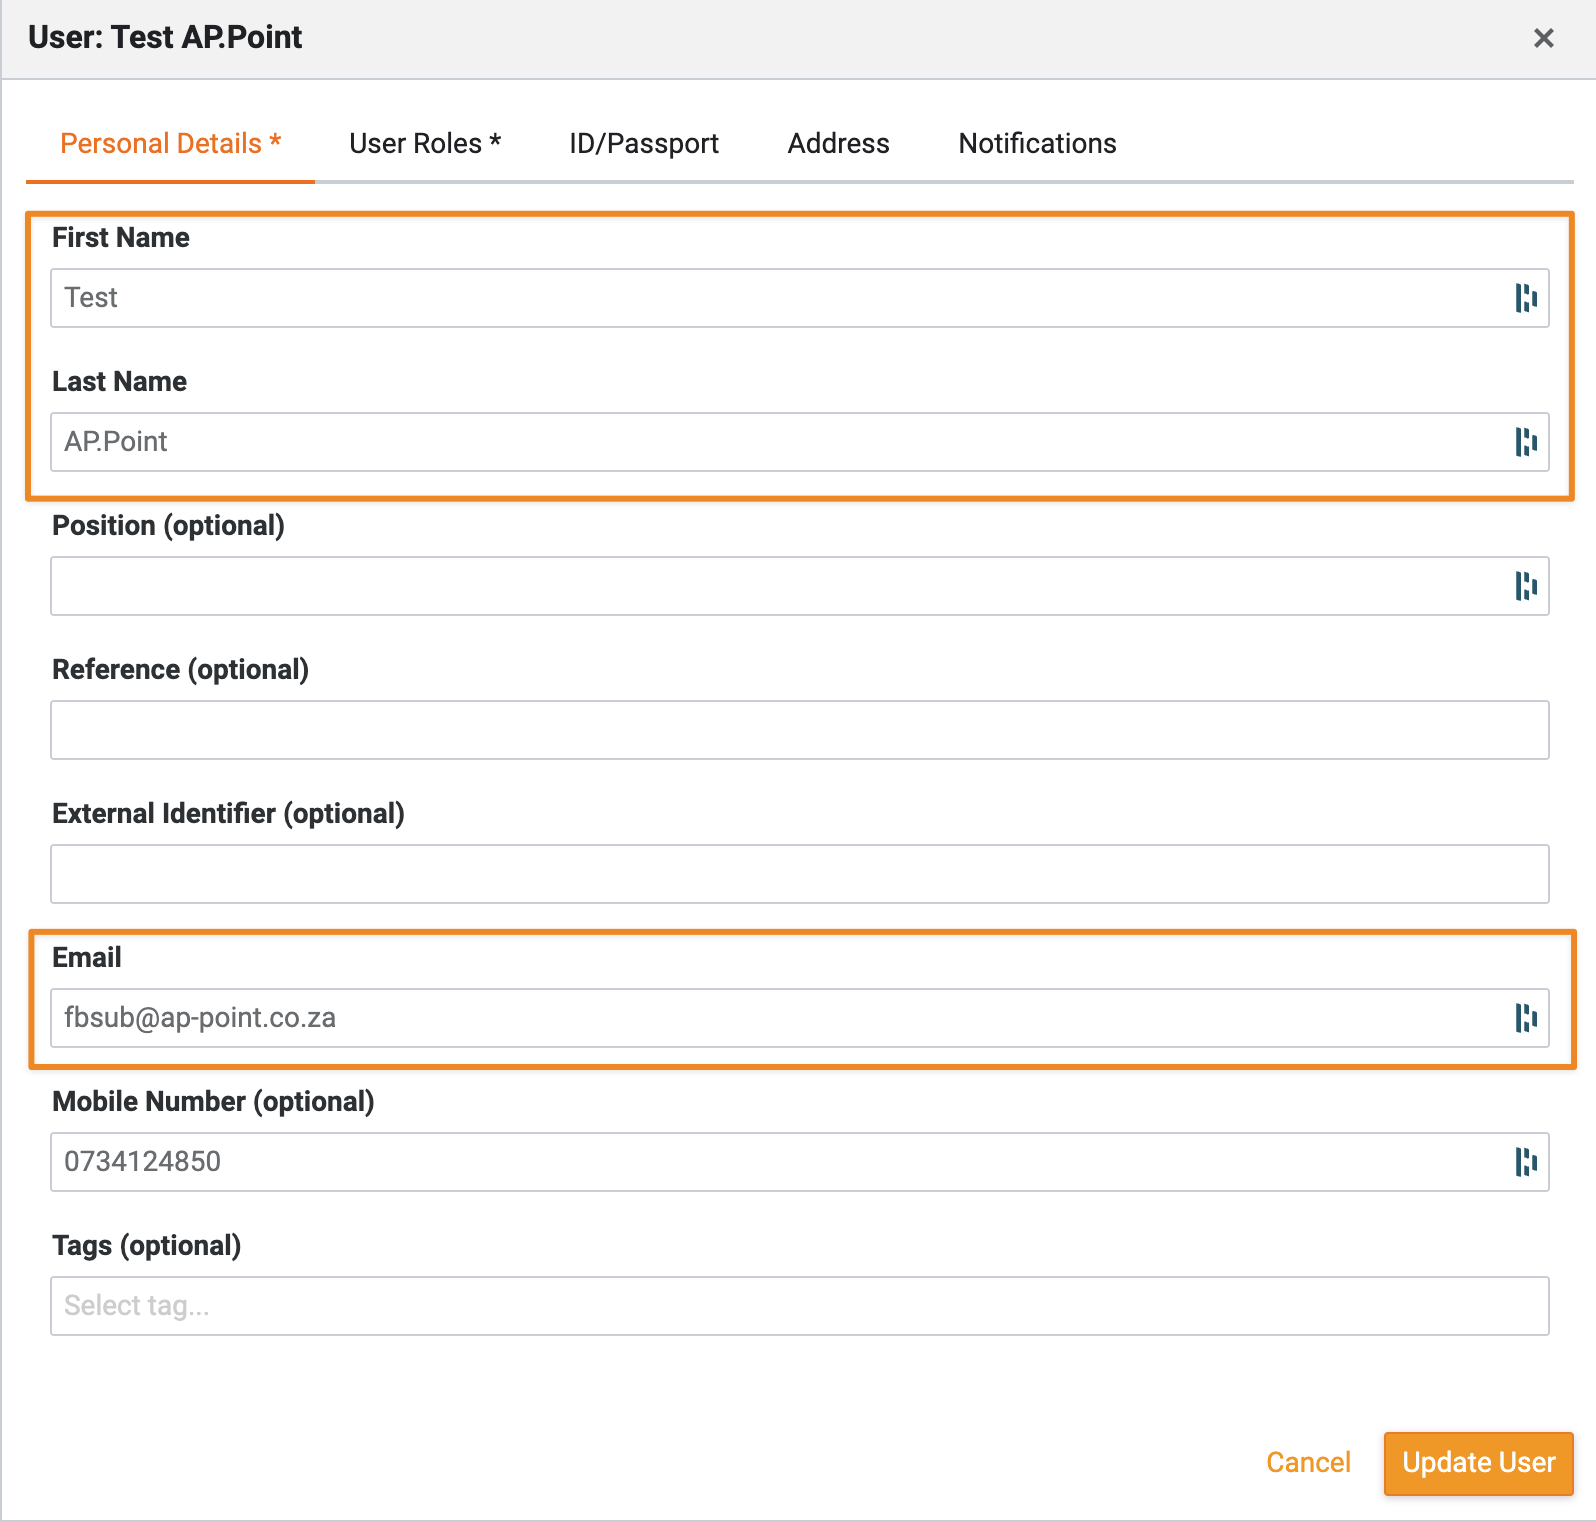
- Enter the user's details such as First Name, Last Name, Email, and optional mobile number.
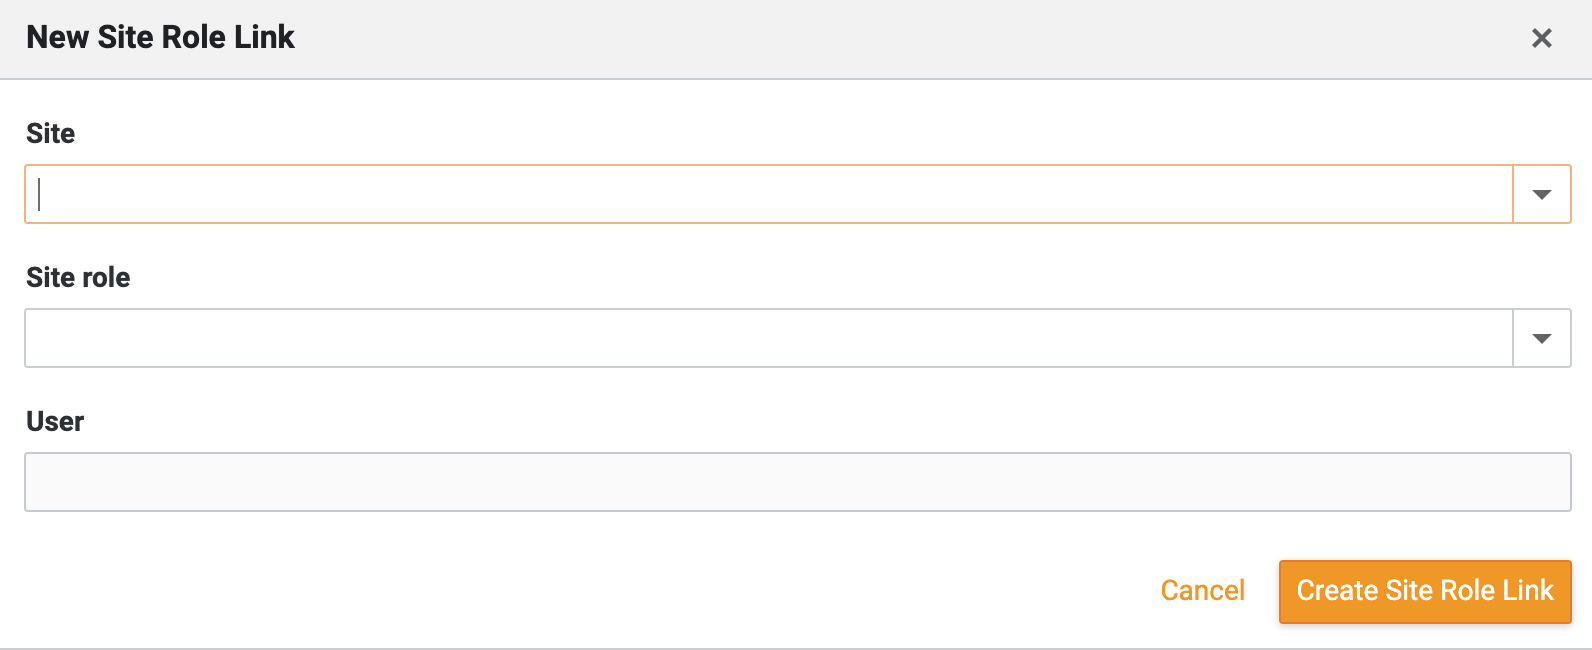
- Select the appropriate user role for the user by choosing User Roles tab and assigning a site role, such as "Restaurant Manager."
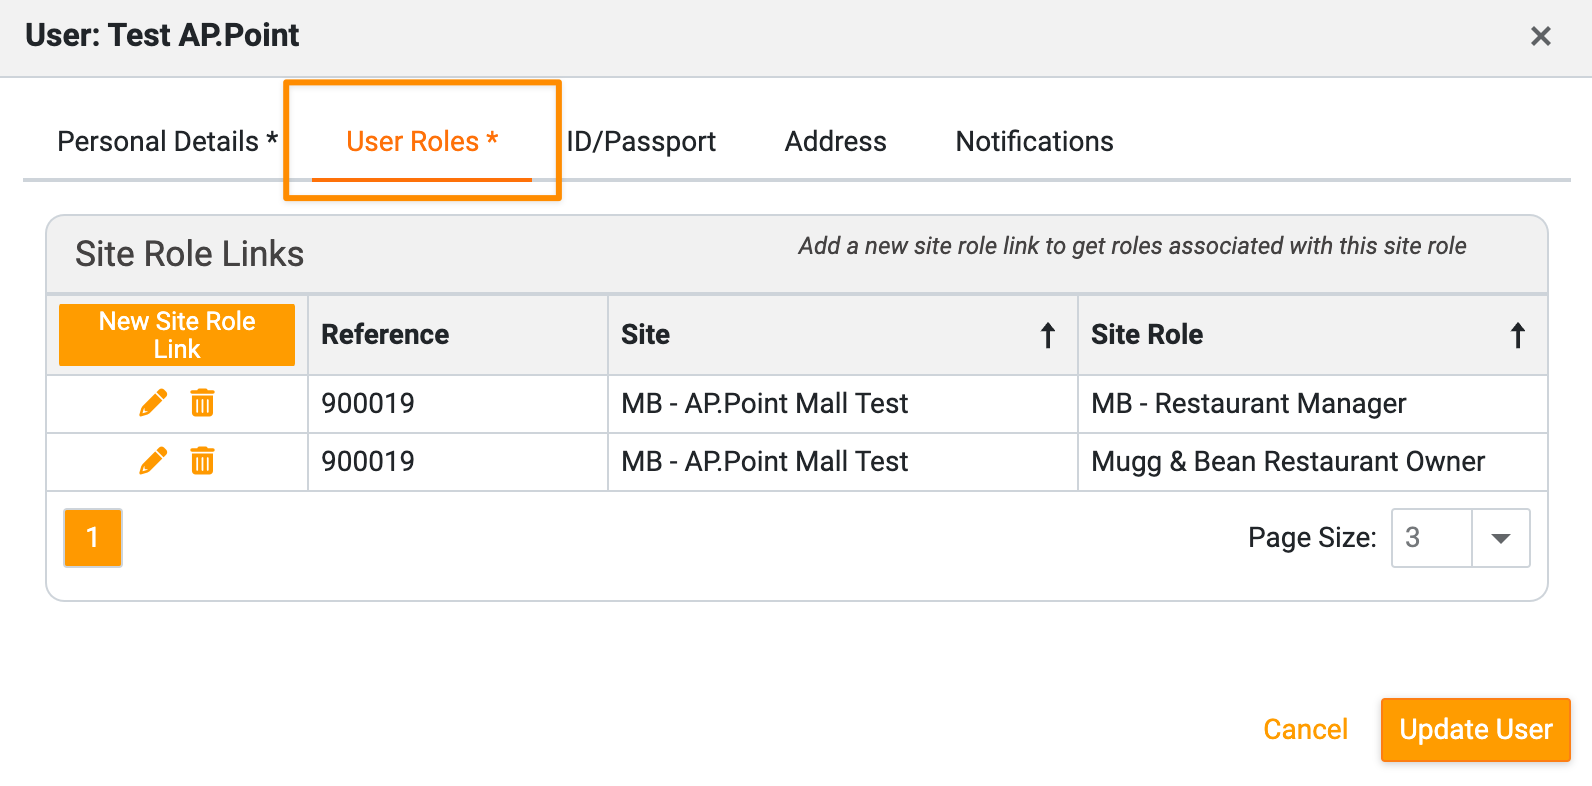
- Click "Create the site role link" to associate the user with the selected site and role.
-
Tabs marked with an
*are important tabs and are required to create a new user. All other tabs are optional.- Other Personal Details
- ID/Passport
- Address
- Notifications
- Teams
- Checklists
- Reports and Dashboard Categories
-
Click "Create new user" to finalize the process. 2 Options are available
- “Create New User”: Creates the new user only and no email is sent to welcome the user. This can be sent later.
- "Create New User and send welcome email": Creates a new user and sends them a welcome email with instructions.
3. Tips and Tricks
Best Practices: Ensure the user is assigned the correct site role to access the necessary functionalities in ODMS
Common Issues and Fixes:
If the user cannot access the required features or jobs, double-check the assigned site role and permissions.
Additional Resources
- For more information on using ODMS for task management, refer to the ODMS user manual or help documentation.